Making Images Pop on Uncoated Paper–How to Create a “Touch Plate” in Photoshop
Granite Bay Design: Graphic Design and Production
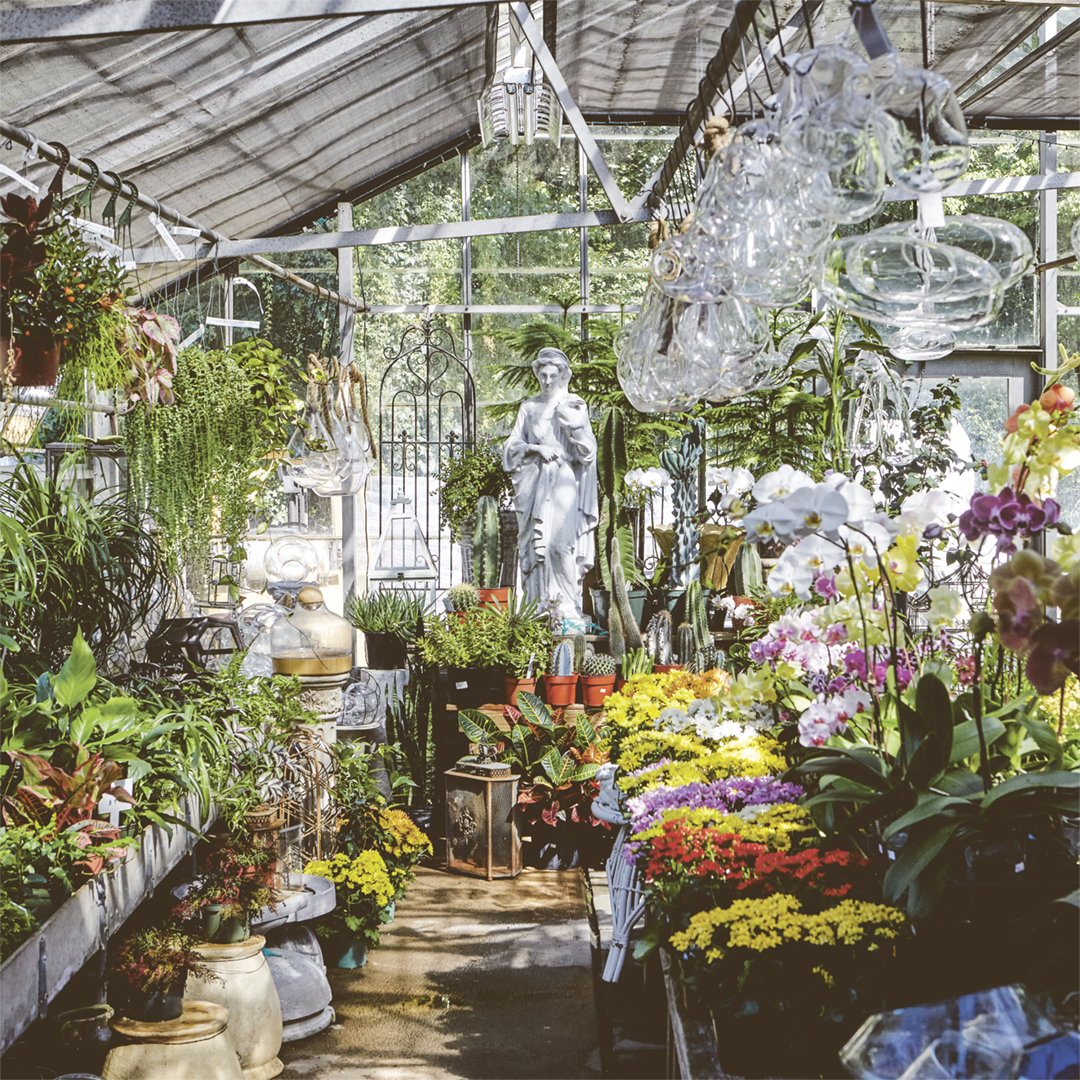
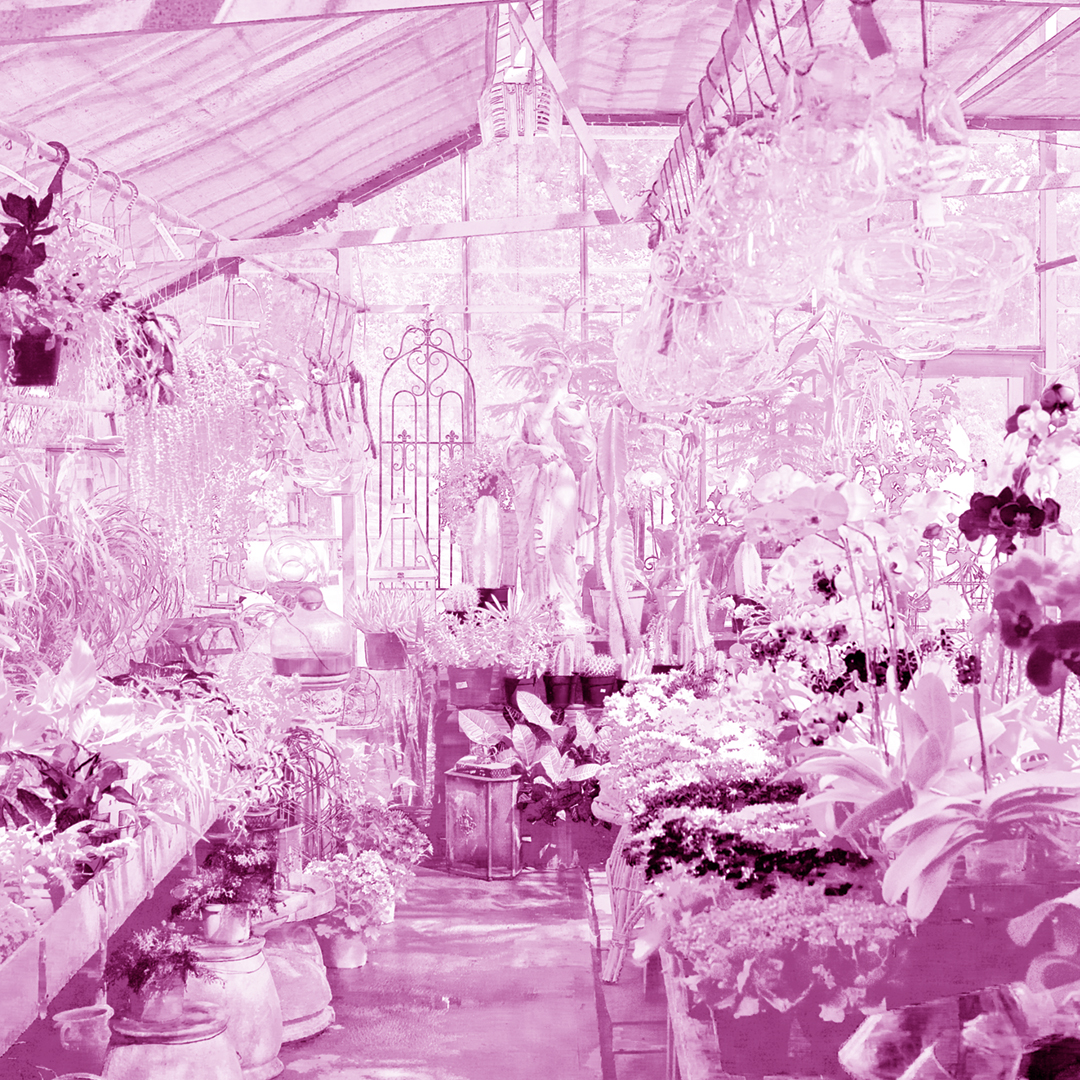
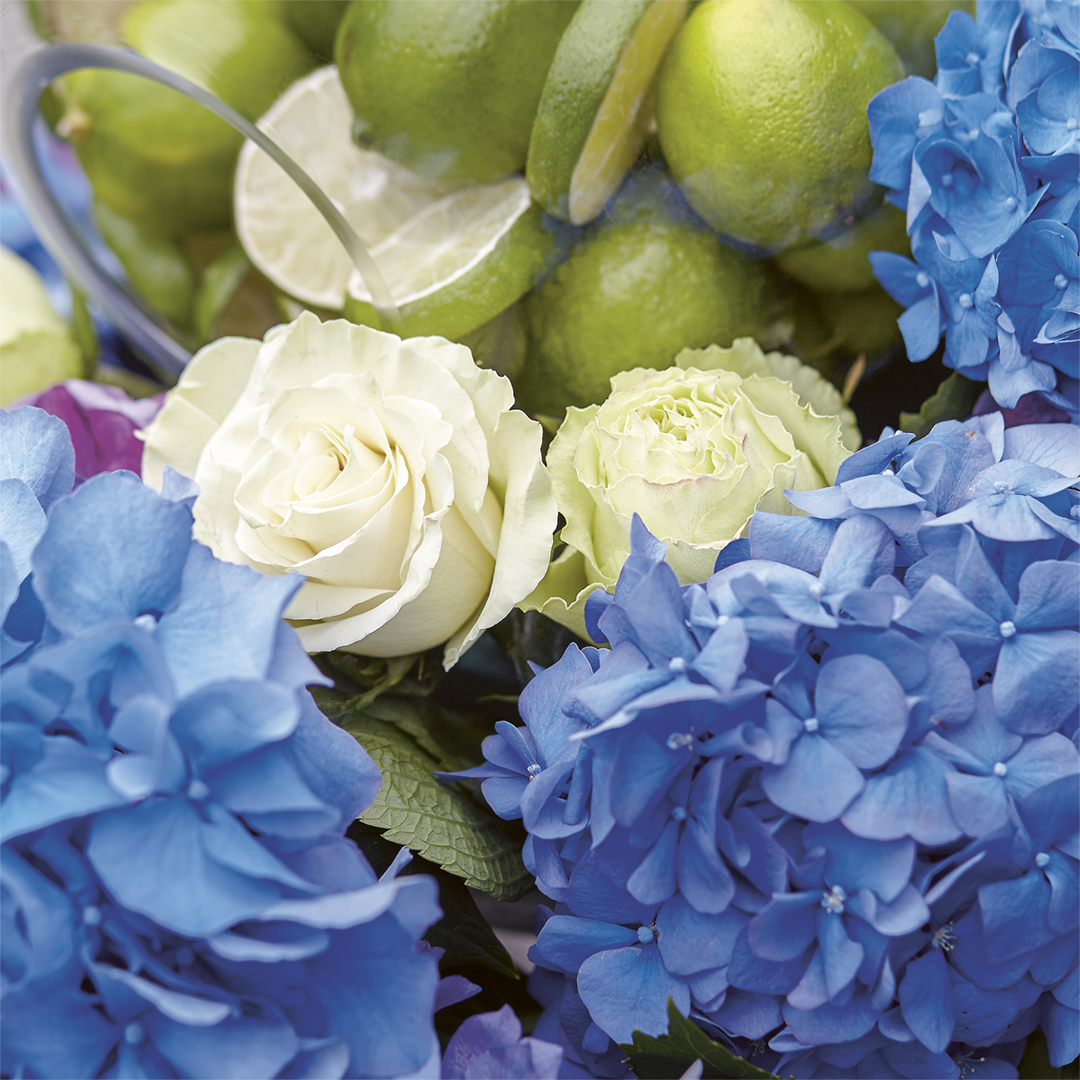
Included on this page: The five color plates: Cyan, Magenta, Yellow and Black plus the black “Touch Plate” and all plates combined in the finished “Orange Bowl” image . Below: Hydrangeas full color image followed by the five plates used to print it (four conventional plates plus our black “Touch Plate”), an overview of the process, a step-by-step tutorial with screen shots, and greenhouse full color image followed by the five plates used to print it.
How to Make a Touch Plate: Madison Flower Shop: Paul Kazmercyk, Granite Bay Graphic Design (All Plates Combined)
Printing images on uncoated paper stock is often fraught with difficulties because uncoated paper absorbs the ink resulting in images that are dull and without the crispness when printing on coated paper. Here’s an overview and step-by-step tutorial on how we achieved outstanding results.
To help celebrate their 50th anniversary of keeping Madison and the surrounding communities beautiful, Madison Flower Shop commissioned graphic designer Paul Kazmercyk and Madison-based photographer Tom Hopkins to create this striking brochure highlighting the many facets of the busy shop’s floral and landscaping business.
 Working with printer George Platt, the creative team decided to print the process color job on a top quality uncoated sheet. But wanting to be sure the photos “popped” they looked at what other creative people had done and found a piece that was printed with a black “Touch Plate”. This solved the problem that often occurs when printing on an uncoated sheet where images look washed out because the ink gets absorbed into the paper. (Unlike with a coated sheet where the ink sits on the surface and generally looks good). It’s often the black plate that suffers the most).
(Note: You can see all of these steps in the step-by-step tutorial below). Working with Tom’s photographs in Adobe Photoshop, I started with the traditional four ink colors (cyan, magenta, yellow and black). I duplicated the black plate which became the black “Touch Plate”. Working on what was now a fifth plate, I “opened up” the lighter areas using the curves function in Photoshop until I had roughly about 1/2 to 2/3 of the original black in that plate. I then used Photoshop’s sharpening tools on that plate to add that extra touch of crispness on the uncoated sheet.
No one involved with the project had ever worked with a black “Touch Plate” before so we ran a press proof using the five-plates (four plates plus the black “Touch Plate”). The press proof was a success. The results actually exceeded everyone’s expectations and the brochure was a success.
You can see the process below step-by-step:
Step-by-Step: Creating a “Touch Plate” (Fifth Plate/Fifth Channel) in Adobe Photoshop
Click any image below to enlarge it.
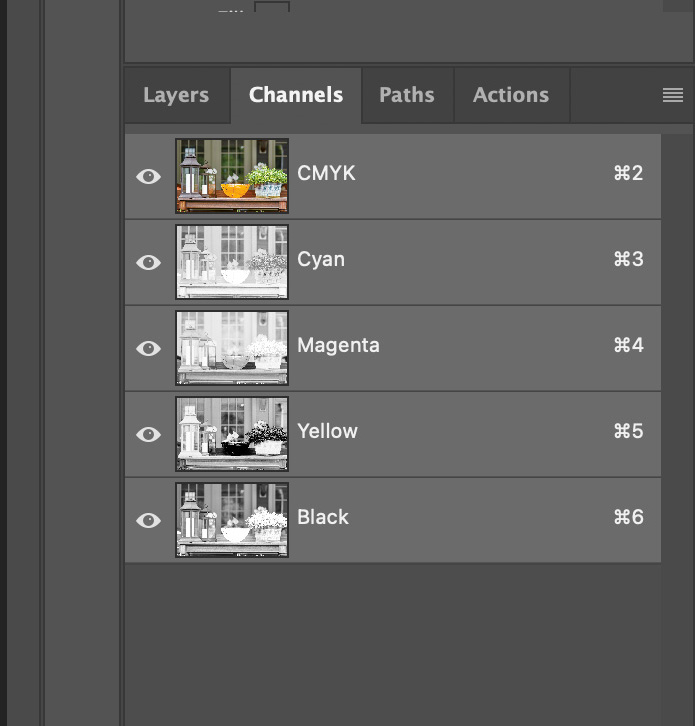
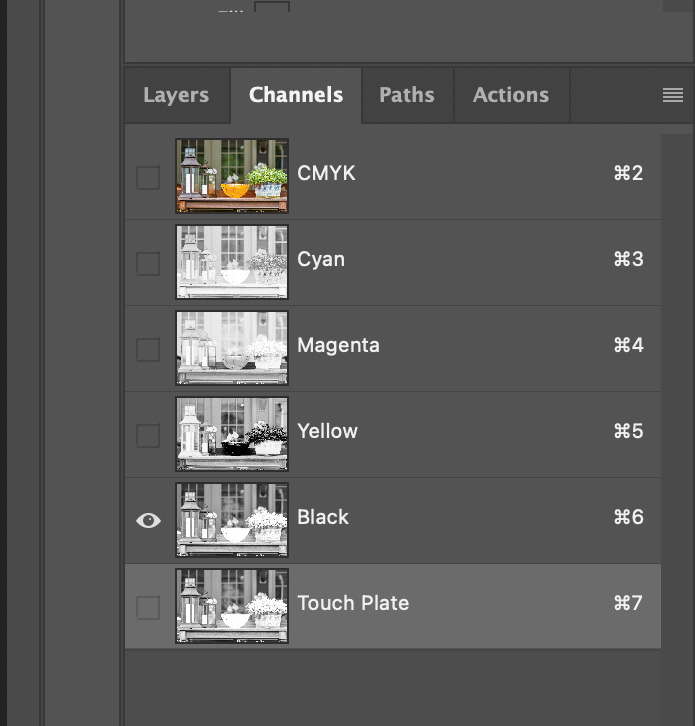
Step 1. The four default channels/plates in Adobe Photoshop: Cyan, Magenta, Yellow and Black (CMYK).

Touch Plate Demo: Adobe Photoshop Default CMYK Channels: Granite Bay Graphic Design
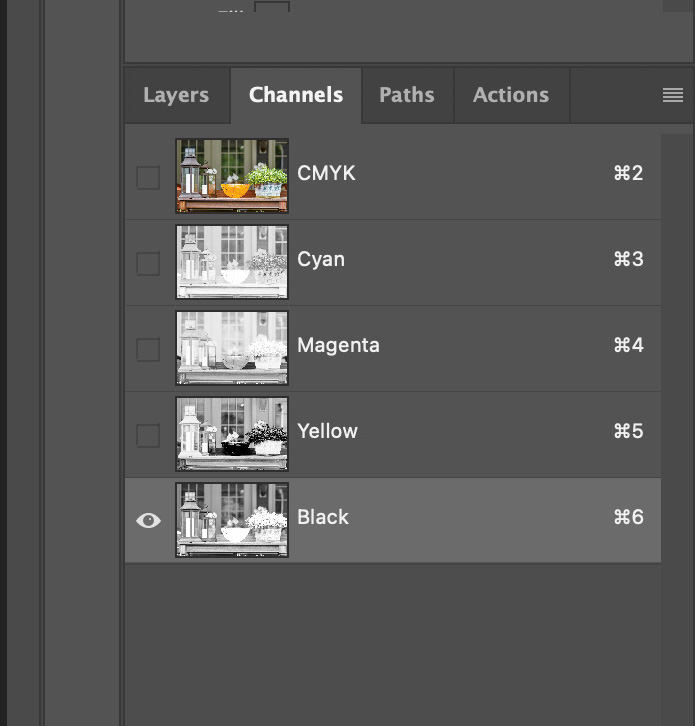
Step 2. To get started, select the black channel in Photoshop.

Touch Plate Demo: Adobe Photoshop Select Black Channel: Granite Bay Graphic Design
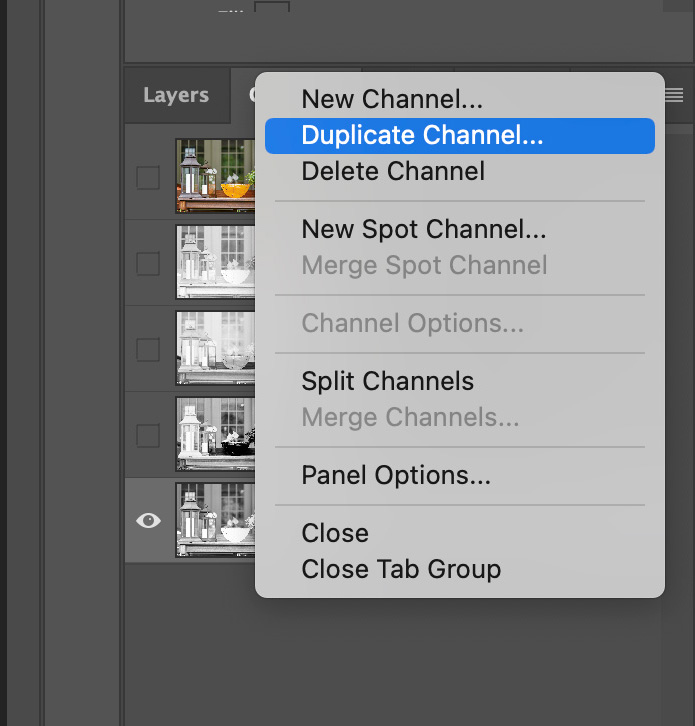
Step 3. From the pull down menu in the upper right, select Duplicate Channel.

Touch Plate Demo: Adobe Photoshop Duplicate Black Channel: Granite Bay Graphic Design
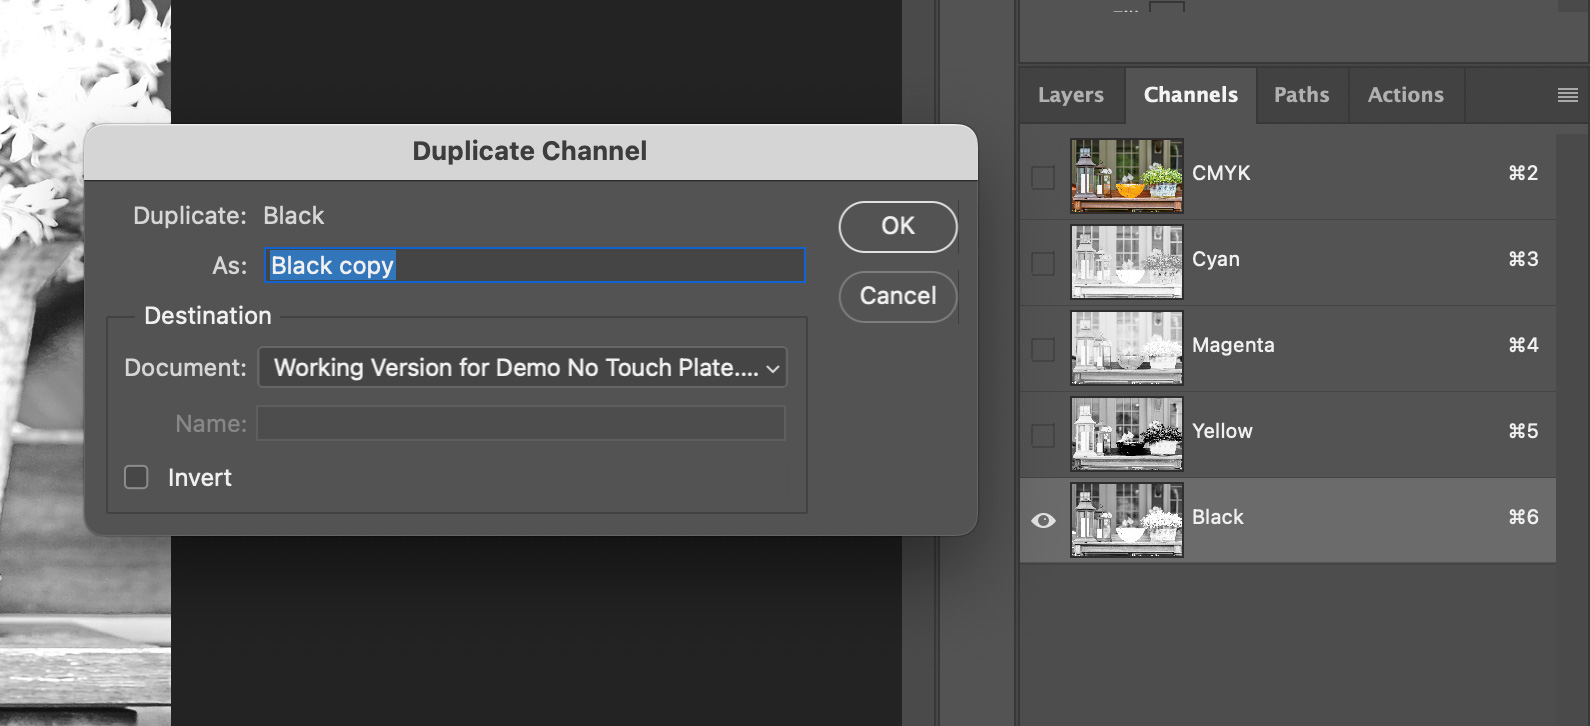
Step 4. When duplicating a channel, the default is “Black copy.” Change the name to “Touch Plate” and click OK. Note: You can rename “Black copy” to anything you’d like. Just be sure to rename it consistently on all images so that you’re only adding one new channel to your InDesign document (see step 10 below).

Touch Plate Demo: Adobe Photoshop Duplicate Black Channel: Granite Bay Graphic Design
Step 5. The new “Touch Plate” channel now shows in the Channels panel.
Step 6. Select the
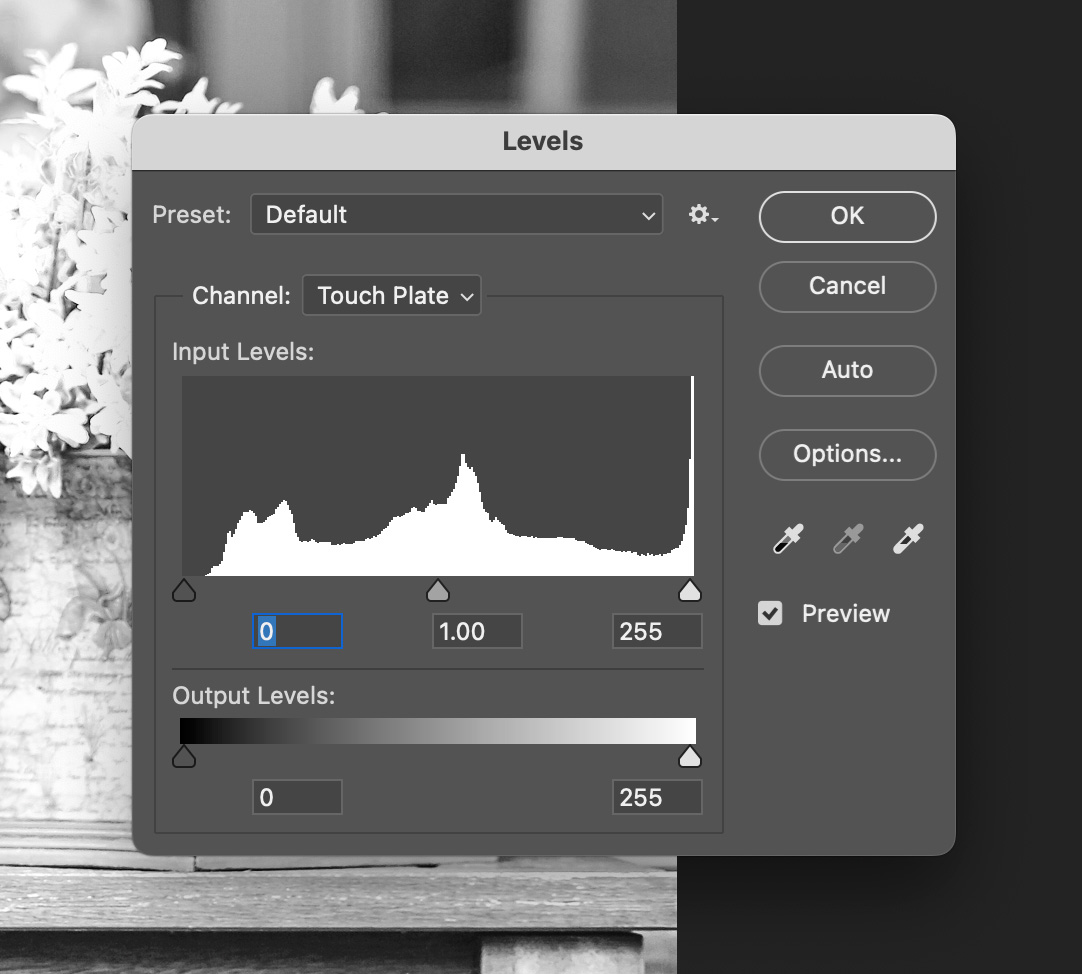
Levels dialog box. Go to Image > Adjustments >
Levels. Here are the defaults. Note: if you’re used to working in
Curves, you can accomplish roughly the same thing as when using Levels. (To access Curves, go to Image > Adjustments > Curves).

Touch Plate Demo: Adobe Photoshop Levels Default: Granite Bay Graphic Design
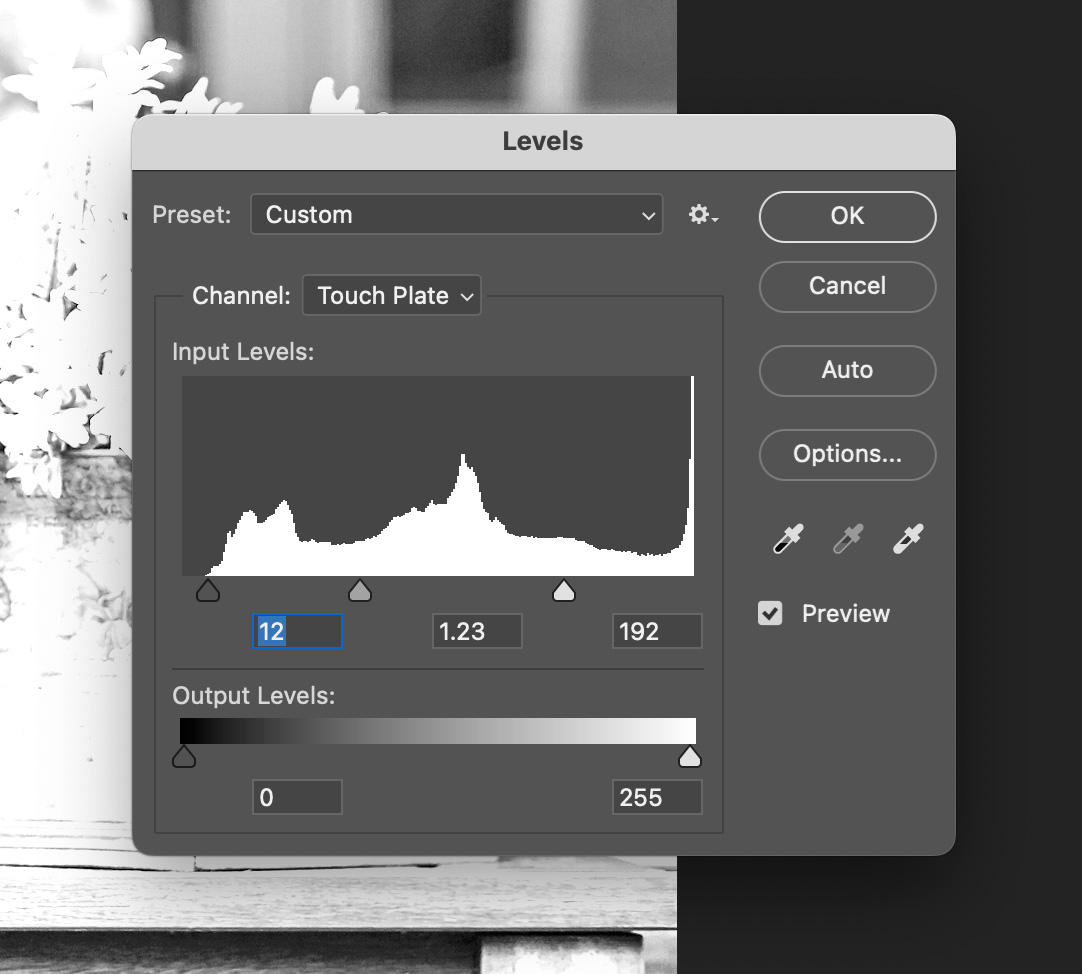
Step 7A. Adjust the
Levels. The defaults (see step 6 above) are 0 | 1.00 | 255. For this example, I’ve changed the values to 12 | 1.23 | 192. I usually start with the highlights (move the right arrow to the left to “open up” the highlights) and see what effect that has on the image. Then I adjust the shadows (move the left arrow to the right), and finally the mid-tones (move the center arrow to the left). See step 7B below for the results.

Touch Plate Demo: Adobe Photoshop Levels Adjusted: Granite Bay Graphic Design
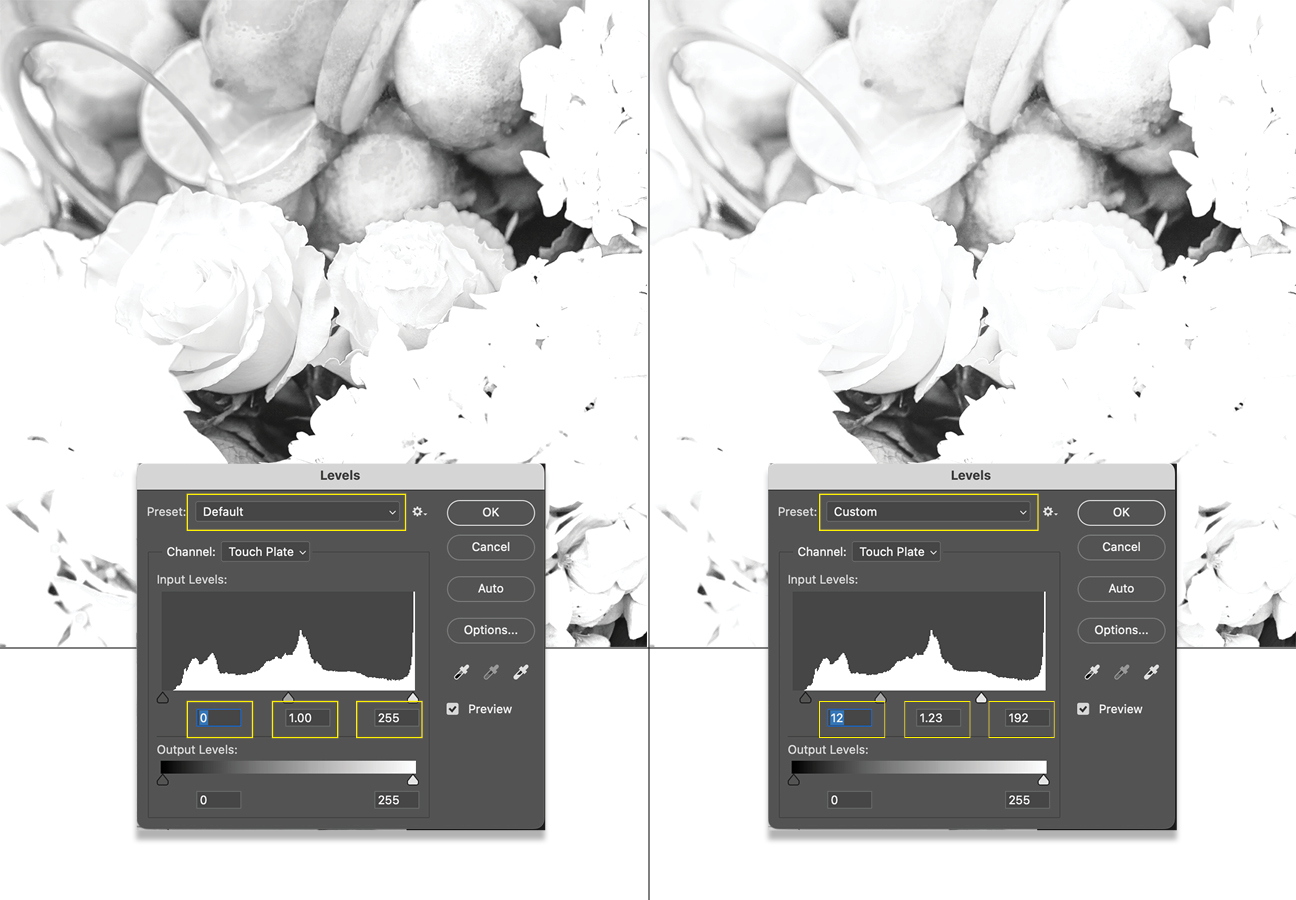
Step 7B. (Click image to enlarge it) This shows a before and after of the Hydrangeas image. On the left is the black “Touch Plate” before any adjustments (at this point, it’s still identical to the black plate which it’s a duplicate of). The image on the right shows the results after adjusting the highlights, shadows and mid-tones using the
Levels dialog box.

Touch Plate Demo: Adobe Photoshop Levels Before and After: Granite Bay Graphic Design
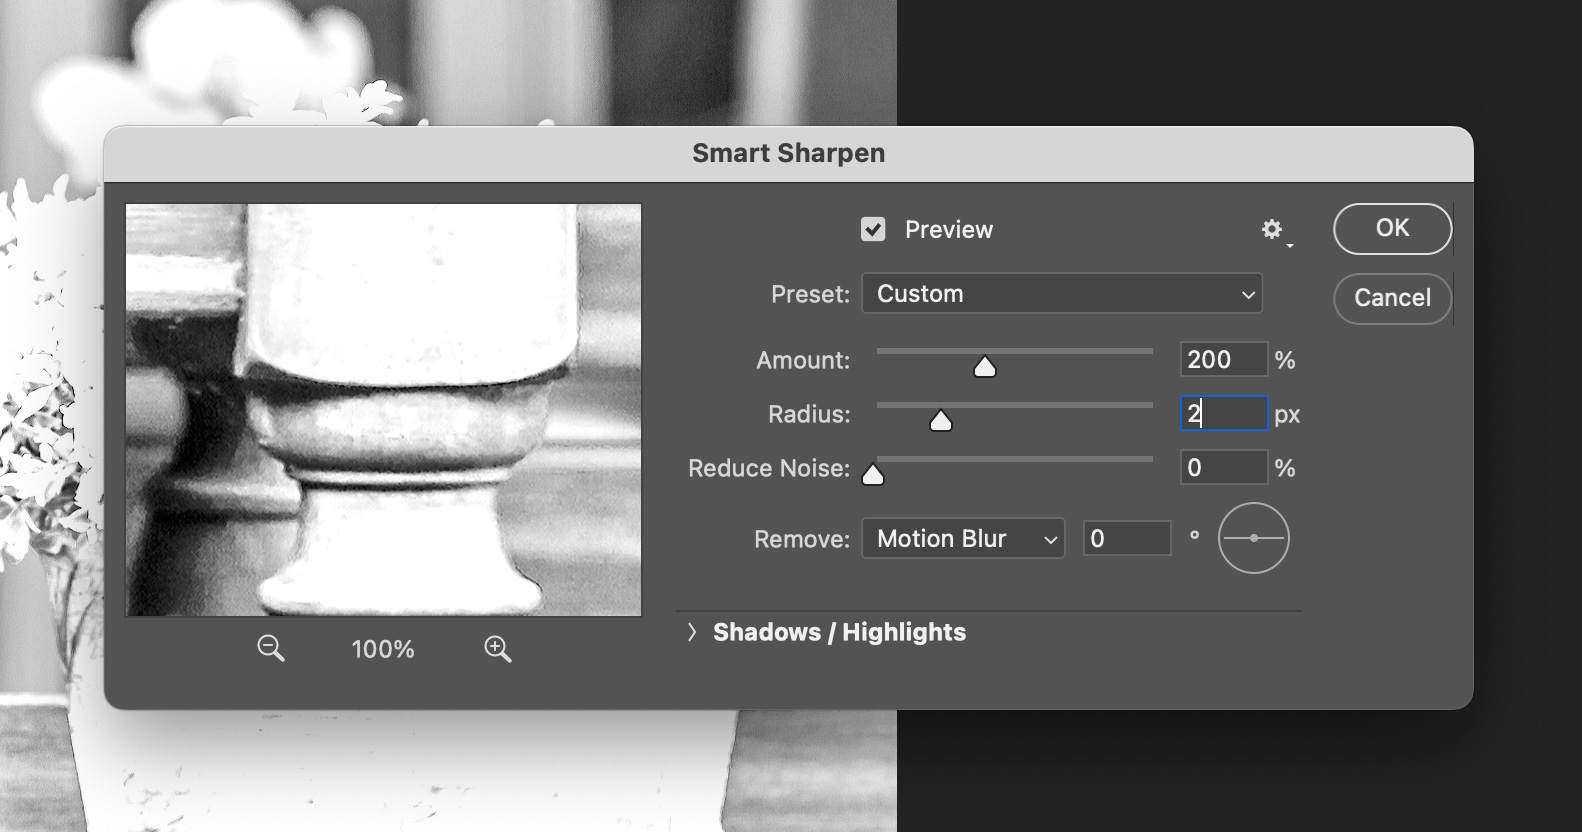
Step 8. Sharpening the black “Touch Plate”: Select Filter > Sharpen > Smart Sharpen*. When sharpening the “Touch Plate” I set the values higher than I would if sharpening a regular four-color/channel image. Since it’s going on an uncoated sheet, I think it helped to define the elements in each photo.
* If you’re used to using other sharpening methods (unsharp mask, etc.) you can achieve approximately the same results.

Touch Plate Demo: Adobe Photoshop Smart Sharpen Adjustments: Granite Bay Graphic Design
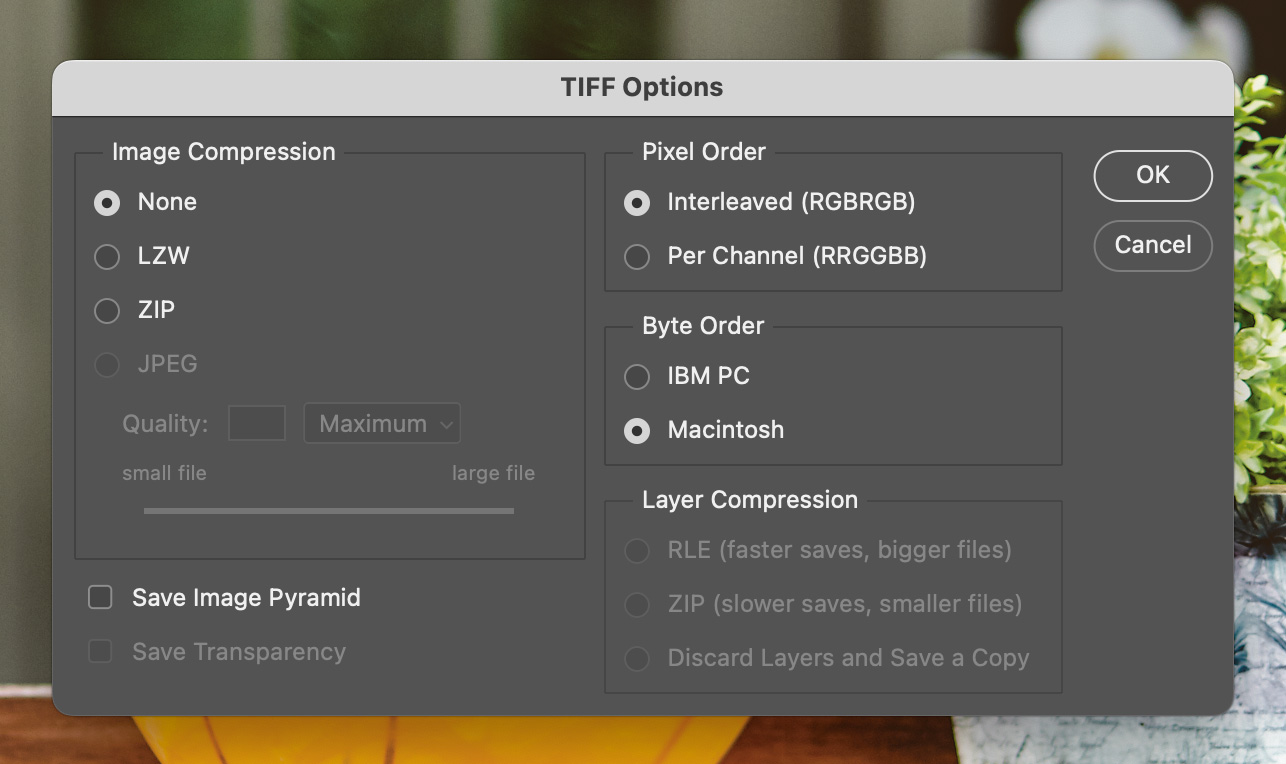
Step 9. Save and export. Once you’re satisfied with the results of the above adjustments, save the document as a TIFF* file (this assures the “Touch Plate” is included. The settings I use are shown here).
*Tagged-Image File Format (TIFF, TIF) is used to exchange files between applications and computer platforms. TIFF is a flexible bitmap image format supported by virtually all paint, image-editing, and page-layout applications.

Touch Plate Demo: Adobe Photoshop Save in TIFF Format: Granite Bay Graphic Design
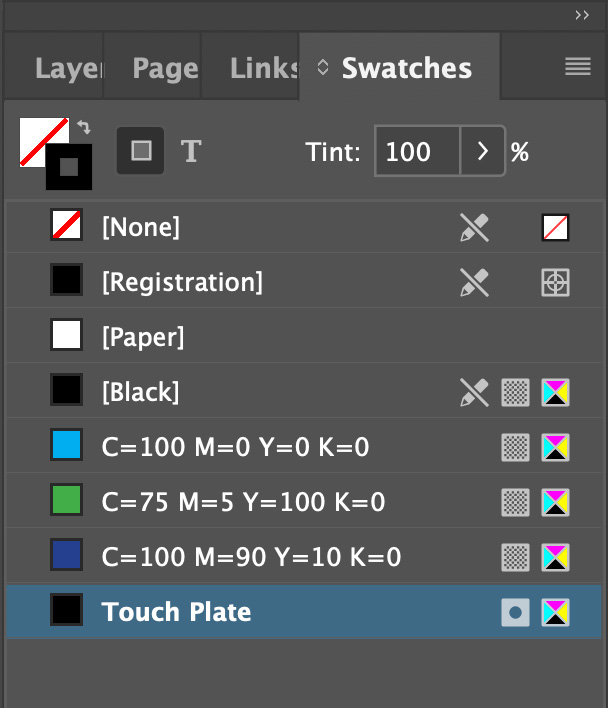
Step 10. Place the file in Adobe InDesign. When you do, you should see the black “Touch Plate” listed in the Swatches panel. If it’s not there, you may need to check your work on the Photoshop file using the steps above.

Touch Plate Demo: Adobe InDesign: Place TIFF and New Channel Added: Granite Bay Graphic Design
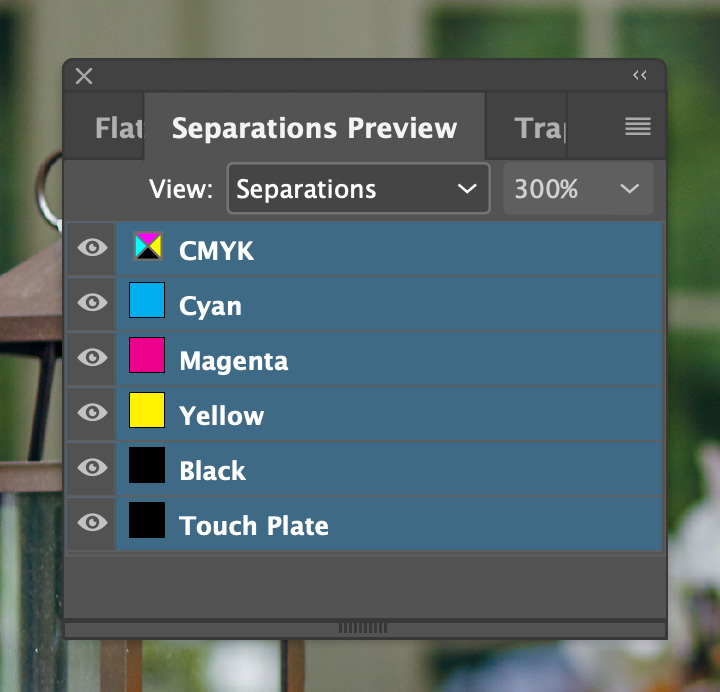
Step 11. You can confirm that InDesign will properly output the separations by using the Separations Preview panel. To access the panel, go to Window > Output > Separations Preview.

Touch Plate Demo: Adobe InDesign: View Separations Preview: Granite Bay Graphic Design
Additional notes: I found it absolutely necessary to work closely with my printer on this project. None of us had ever done a black “Touch Plate” before. Because of that, we built a press proof into the cost of the project.

 Working with printer George Platt, the creative team decided to print the process color job on a top quality uncoated sheet. But wanting to be sure the photos “popped” they looked at what other creative people had done and found a piece that was printed with a black “Touch Plate”. This solved the problem that often occurs when printing on an uncoated sheet where images look washed out because the ink gets absorbed into the paper. (Unlike with a coated sheet where the ink sits on the surface and generally looks good). It’s often the black plate that suffers the most).


